Create Pinterest Pins Fast Using Tailwind

Pin this post to Pinterest! ☝🏻
IN THIS POST:
WHY PINTEREST?
If you have a blog, Pinterest should be your best friend. Pinterest is sort of like Google but for images. There are 465 MILLION people using Pinterest each month. And that's just users... not searches.
If each person did 10 searches (which is a very conservative number), that would equate to 4.65 BILLION searches a month.
That number should blow your mind. 🤯
My guess would be that you don't have 465 million people on your site each month - I sure don't!
With this many people searching Pinterest, you need to get your content in front of them! Anything you post on Instagram or Facebook is here today and gone tomorrow.
Information on Pinterest is not just easy to find, but it can also be pinned (or saved) so that people can come back to it.
Here's just a few reasons you should be on Pinterest -
Increased awareness
Increased leads
Increased blog traffic
Increased sales
Ok, so we've established that Pinterest is one of the best ways to grow your blog and drive traffic to your website. To do that successfully, Pinterest recommends pinning 6-15 pins per day.
Now before you say, "But I don't have time for social media" - hear me out.
I am right there with you...I hate social media as much as I hate mosquitos and summers in Texas. I don't have any social media for my business or my personal life. In fact, just the word "social media" makes me twitch.
BUT!
Allow me to introduce you to Tailwind... It basically does all of the work for you so that you don’t have to manually post to Pinterest multiple times a day. And the free version will work just fine for what you need!
Trust me, after I've spent HOURS creating a blog post, I need a really easy process like this to blast my post out to the masses.
But first we need to design some pins...
HOW TO DESIGN YOUR PINS
In order for a pin to be successful, it first needs to grab the user's attention and stop them from scrolling. First impressions are always by looks...whether it's a pin, a plate of food, or a tall, handsome guy.
Here are some tips to create a pin that converts:
Always create your pin in a 2:3 ratio - which is 1000px wide x 1500px tall.
Use high quality, eye catching images. (Need help finding images?)
Make sure the text is readable - consider the font size as well as if it's on a contrasting background color.
Be sure to include your logo (always!!) and the URL is helpful too.
Create a cohesive look so that people will be able to identify your pins right away.
I use a template I created in Figma to create all of my pins. I just duplicate the designs and replace the text/image each time I create a blog.
I like using Figma because:
It’s incredibly easy
It also helps me see which images will work well with other the other blog images on my site.
If I need to go back and resize the images later (like that time I had to resize everything), the old images are still there.
Plus it just looks pretty to see everything laid out together. 😍

Now that we have some pins, let's start pinning!
WHAT IS TAILWIND?
Tailwind allows you to schedule your pins in bulk so that you don't become a slave to Pinterest.
Side note: You can also connect your Instagram and Facebook accounts to Tailwind and schedule posts on those platforms, but this post is geared towards Pinterest since that's what I use it for.
Here's just a few things I love about Tailwind:
Ghostwriter: If you're stuck trying to find the right keywords to post, Ghostwriter will generate copy for you.
Calendar: View all of your pins in one place so you can see when they're scheduled to post.
Smart scheduler: Tailwind suggests times to pin your content based on when your audience is most engaged.
Weekly summary reports: Get weekly recaps of what you pinned and how many new followers you gained.
HOW TO GET STARTED
Step 1: If you don't already have an account, you can create one for free (no credit card needed).
Step 2: Connect Tailwind to Pinterest by clicking the gear icon and clicking Account Settings, then click Add A New Account.


Step 3: Follow the instructions to authorize Tailwind access to Pinterest.
HOW TO START PINNING
Step 1: Log into your dashboard and click Upload or Create Posts

Step 2: Drag and drop all of your images at once.

Step 3: Select the pins under Post Types that you want to pin. You'll notice that the Facebook and Instagram options are grayed out since I don't have those connected to Tailwind.

Step 4: Click the "Go schedule posts" button. You can also save them as drafts if you want to come back to it later.

Step 5: Enter the information for the pin. On this page you'll enter the Title, Description, URL, Pin Destination, and when to post.
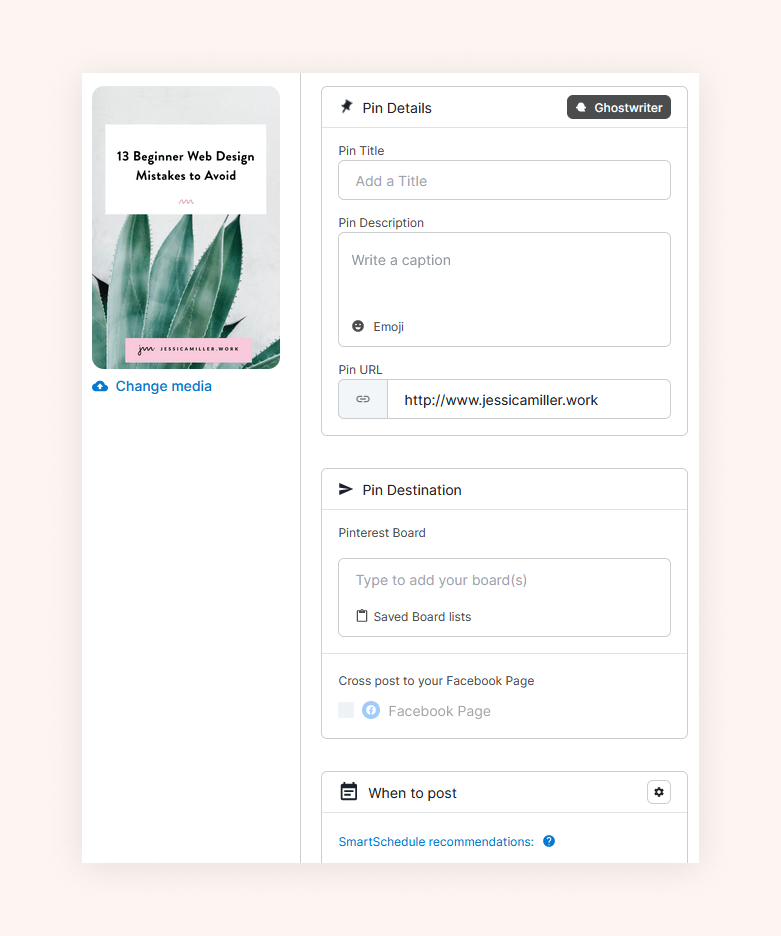
There are a few things to keep in mind:
I usually fill out each type of field all at once. So I'll paste the title in each pin, then paste the description for each pin, etc. It's much faster than doing one pin at a time.
Be sure your description includes keywords that people will be searching for!
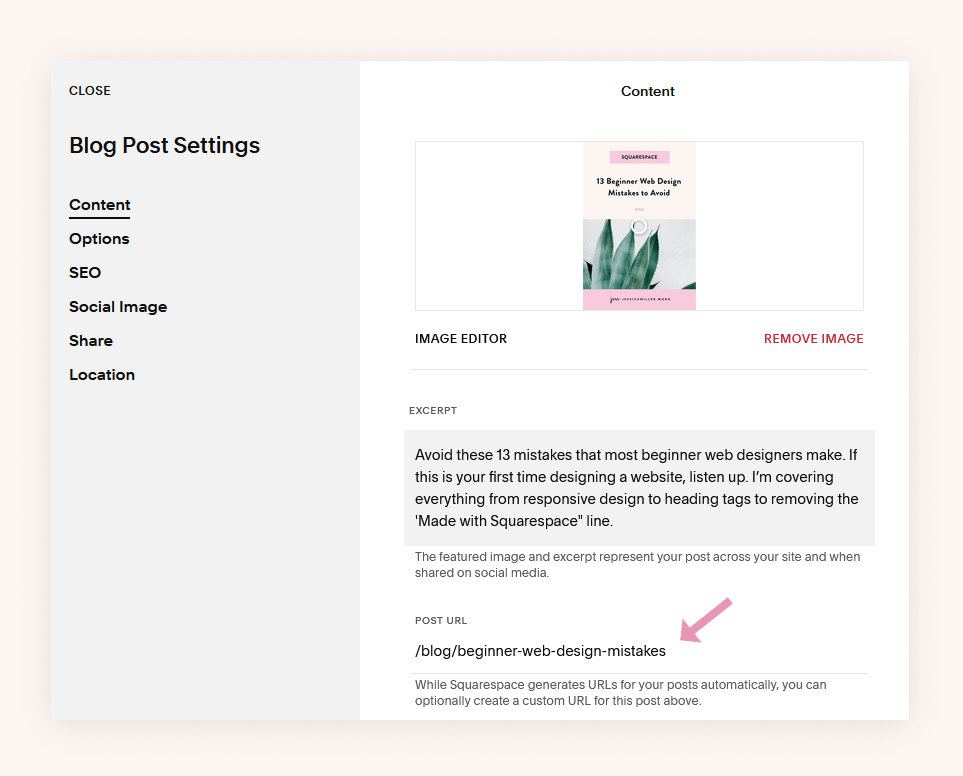
If you scheduled your blog post and it isn't live yet, go to the Settings of the blog post in Squarespace to get the Post URL and paste it in Tailwind.
You'll need to create your boards in Pinterest first (you can't create them in Tailwind). Once they're created in Pinterest, then they will show up in Tailwind to pin your items to.
If you're pinning the same URL, be sure to spread it out over a few days so you aren't pinning that URL more than once in a 24 hour period.
Step 6: Once all of the information is filled in, click the Schedule Post button for each pin. That's it!

WHICH PLAN IS BEST?
Frankly, I use the free plan and it works great for me. There are a few limitations though, so you may want to consider a paid plan if it fits your needs better. They run discounts all the time so you shouldn't have a problem saving some money!
The free plan is limited to 20 posts a month, which if you're pinning multiple posts a day, you're going to run out pretty quickly. The next tiered plan gives you 200 posts a month, which is a big jump! You also get more Ghostwriter credits so you can have more posts written for you.
Here's all of the pricing and what's included in each plan. If you're a one man band like me, you should be good on the Free or Pro plan.

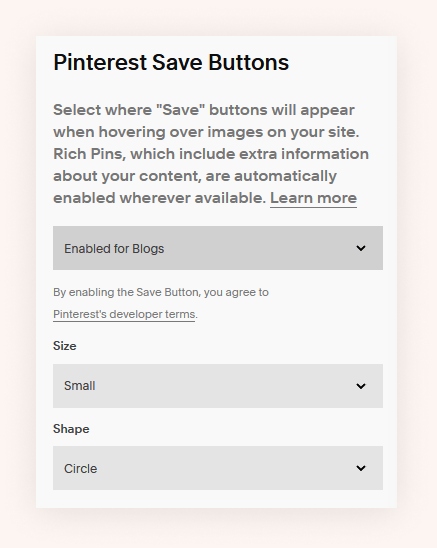
ENABLE PIN BUTTON
I want to show you one last EASY thing to implement on your Squarespace site so that people can pin an image directly from your site. If you'll notice, the images on my site have the little Pinterest logo in the corner when you hover over them. I also prompt people to pin the post by including the text under the image.

To enable the pinterest save button, log into the back end of your site and click Settings -> Pinterest Save Buttons. Select the drop down to choose which pages you want the Save Button to appear on. You can also set the size and the shape. Click Save and you're done!
*This post may contain affiliate links, so I may earn a small commission when you make a purchase through links on this site at no additional cost to you.