How to Add a Read Time to Your Squarespace Blog

Pin this post to Pinterest! ☝🏻
ADDING A READ TIME TO YOUR SQUARESPACE BLOG POST
I don't know about you, but I never seem to have enough time in my day. And because of that, time is of the essence. I want to know how much time it's going to take me to read an article or listen to a podcast before I decide if I'm going to dig in.
Adding a read time to your Squarespace blog is a great way to give people a heads up and let them know approximately how much time it's going to take to read the post. I also find it helpful because it lets people know if they need to skim an article for what they’re looking for (if it's a long read time) or if they can take their time reading it.
If you do have a rather lengthy read time, adding a Table of Contents to your post will help people find the information easier.
Here's the look we're going for. We’re going to be adding a read time under the blog title - and bonus points for adding an icon!

All it takes to add the read time is some very simple code. It's a simple copy/paste. I'll show you how to tweak it if you choose to - but really, just copy and paste the basic code and you're golden.
Psst: This post ties in perfectly with the ‘how to create a blog’ series - catch them here, here, here, and here.
HOW TO ADD A READ TIME TO YOUR BLOG POST
There are 3 basic snippets of code to add.
STEP 1: ADD THE CODE THAT CALCULATES THE TIME
Here's the code you'll need:
<!-- Read Time on Blog -->
<script src="https://ajax.googleapis.com/ajax/libs/jquery/3.4.1/jquery.min.js"></script>

<script>
  $(function () {
    var wordCount = 0;
    $("article .sqs-html-content").each(function() {
      var txt = $(this).text().replace(/[^\w ]/g, "").split(/\s+/);
      wordCount += txt.length;
    });
    var readingTimeInMinutes = Math.floor(wordCount / 228) + 1;
    var readingTimeAsString = readingTimeInMinutes + " MIN READ";
    $('article .reading-time').appendTo('article .blog-item-title');
    $('article .reading-time').html(readingTimeAsString);
  });
</script>
<!-- End Read Time on Blog -->
Copy the code then go to Website -> Website Tools -> Code Injection and paste this in the HEADER section.

This code is actually javascript and it calculates the time it will take to read your blog. Let me break it down:
var readingTimeInMinutes = Math.floor(wordCount / 228) + 1; This tells it to count the number of words in your post and divide it by 228 (the number of words it guesstimates someone can read in one minute).
var readingTimeAsString = readingTimeInMinutes + " MIN READ"; This tells it to display the amount of time in minutes and add "MIN READ" after the number.
$('article .reading-time').appendTo('article .blog-item-title'); This tells it to display the read time under the title of your blog.
TIP: The only thing you might want to change in this section is the "MIN READ" that comes after the number of minutes. Maybe you want yours to be all lower case, or maybe you want to spell out "MIN" to "minutes". Whatever it is, feel free to change that text AND ONLY THAT TEXT! It's incredibly easy to accidentally delete a part of code when you start tweaking things...and every little character in code is vital to it working.
STEP 2: ADD HTML TO THE BLOG
Here's the code you'll need:
<div class="reading-time"></div>
Copy the code then click the gear icon on your blog, click Advanced -> Post Blog Item Code Injection and paste it there.

Adding this code will add the read time to EVERY blog post. That will save you from having to add code to every single blog post. Basically this code is just putting a "class" on your page and the CSS in the next step will tell the class what to do.
Do not change this code at all, otherwise it won't work!
STEP 3: ADD CSS
Here's the code you'll need:
//add reading time to blog//
.reading-time {
  color: #E996B4;
  font-size: 15px;
  font-family: 'karla';
}
Copy the code then go to Website -> Website Tools -> Custom CSS and paste this code.
Once you've pasted this code, you should see the read time appear on your blog post.
This code matches the design on my site, so you will probably want to change it for yours. Here's what to change:
color: #E996B4; <- Change this to your own hex color
font-size: 15px; <- Adjust this number so that the size looks good with the other text on your site
font-family: 'karla'; <- Change this to the font that you use on your site
BE SURE if you change anything that you keep the semicolon at the end of EACH line.
It's also important not to change the ".reading-time" part of the code. You'll notice that it matches "reading-time" in the code that we added in Step 2. Those have to be the same words in order for it to work.
Code is sort of like giving someone instructions on how to paint a wall (use this brush, use this color, etc). The CSS in this step is the instructions for painting and the HTML in the previous step is which wall to apply the paint to. Make sense?

HOW TO ADD A READ TIME TO THE BLOG OVERVIEW PAGE
There’s one more simple step if you want to add your read time to the overview page. Adding it to this page lets readers know how long each blog post will take to read without having to go to the actual page to see the time.
This code places the read time just under the meta section that shows your blog categories.

STEP 1: ADD THE CODE
Here's the code you'll need:
<!-- Read Time on Blog Overview Page -->
<script>
  $(function () {
    // Loop through each overview item on the page
    $('.blog-item').each(function() {
      var overviewItem = $(this);
      var postUrl = overviewItem.find('a').attr('href'); // Get the URL of the blog post

      // Fetch the blog post content to extract the reading time
      $.get(postUrl, function(data) {
        var postContent = $(data).find('article').text(); // Extract content of the blog post
        var wordCount = postContent.replace(/[^\w ]/g, "").split(/\s+/).length; // Count words
        var readingTimeInMinutes = Math.ceil(wordCount / 228 / 2); // Assuming average reading speed is 228 words per minute
        var readingTimeAsString = readingTimeInMinutes + " MIN READ";

        // Create a new span element to hold the reading time
        var readingTimeElement = $('<span>').addClass('reading-time').text(readingTimeAsString);

        // Create a line break element
        var lineBreak = $('<br>');

        // Append the line break and the reading time span into the corresponding overview item's .blog-meta-section
        overviewItem.find('.blog-meta-section').append(lineBreak).append(readingTimeElement);
      });
    });
  });
</script>
<!-- End Read Time on Blog Overview Page -->
Copy the code then go to Website -> Website Tools -> Code Injection and paste this in the HEADER section. You will paste this right under the code that you already pasted in the Header section from the earlier instructions.
Hit “Save” and you’re done!
HOW TO ADD A READ TIME TO A SUMMARY BLOCK
If you want to take it even one step further, here’s how to add the read time to your summary block.
STEP 1: ADD THE CODE
Here's the code you'll need:
<!-- Add Read Time to Summary Block -->
<script>
  $(function () {
    // Loop through each overview item on the page
    $('.summary-item').each(function() {
      var overviewItem = $(this);
      var postUrl = overviewItem.find('a').attr('href'); // Get the URL of the blog post

      // Fetch the blog post content to extract the reading time
      $.get(postUrl, function(data) {
        var postContent = $(data).find('article').text(); // Extract content of the blog post
        var wordCount = postContent.replace(/[^\w ]/g, "").split(/\s+/).length; // Count words
        var readingTimeInMinutes = Math.ceil(wordCount / 228 / 2); // Assuming average reading speed is 228 words per minute
        var readingTimeAsString = readingTimeInMinutes + " MIN READ";

        // Create a new span element to hold the reading time
        var readingTimeElement = $('<span>').addClass('reading-time').text(readingTimeAsString);

        // Create a line break element
        var lineBreak = $('<br>');

        // Append the line break and the reading time span into the corresponding overview item's .blog-meta-section
        overviewItem.find('.summary-metadata-container').append(lineBreak).append(readingTimeElement);
      });
    });
  });
</script>
<!-- End Read Time on Summary Block -->
Copy the code then go to Website -> Website Tools -> Code Injection and paste this in the HEADER section. You will paste this right under the code that you already pasted in the Header section from the earlier instructions.
Hit “Save” and you’re done!

BONUS: ADD AN ICON
If you want to do a little extra and add an icon before the read time, here's the steps for that. It's a little more involved, but totally doable!
STEP 1: FIND/CREATE AN ICON
I created my icon in Figma using the Iconify plugin. You could also just search "clock icon" on Google Images to find one. I resized mine to 16x16 and gave it the same color as my text (#E996B4).

STEP 2: ADD CSS
Copy this CSS and paste it by going to Website -> Website Tools -> Custom CSS
//add icon to read time//
.reading-time:before {
    content: "";
    display: inline-block;
    background-image: url(YOUR-URL-HERE);
    background-repeat: no-repeat;
    width: 16px;
    height: 16px;
    margin-right: 5px;
    margin-bottom: -2px;
    background-size: 16px;
}
As long as your icon is 16x16, it should perfectly align with the text. If not, you may want to play around with the margin-bottom number.
STEP 3: ADD YOUR ICON
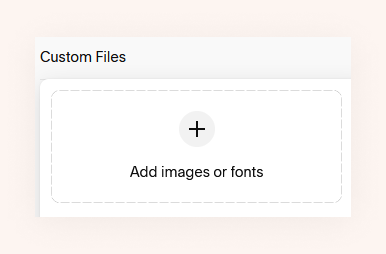
Now we need to add the icon you created in Step 1. In the same place where you added the code above, click Custom Files and Add Images or Fonts then select your icon.
STEP 4: REPLACE THE CODE WITH YOUR ICON
Go to the code you pasted and remove YOUR-URL-HERE. Leave your cursor in between the parentheses, then click Custom Files and select the icon that you added in Step 3. Then click Save.
Now your icon should be showing up! If it isn't, go back and make sure there aren't any characters missing from the original code. It's very easy to accidentally delete a character once you start changing things.
If you implement this on your site, I’d love to see it! Feel free to drop a link in the comments below. And give yourself a pat on the back because you just tackled Javascript, HTML, AND CSS! See? Not that intimidating ;)
*This post may contain affiliate links, so I may earn a small commission when you make a purchase through links on this site at no additional cost to you.